Question: How to work with Glare effects in Kdenlive?
Problem Description
I’ve recently watched this tutorial on workflow for Glare effects in Blender. I got satisfactory results in GIMP.
The workflow in short:
Render two images:
1.1. One without with the Glare effect, with transparency, and against the fully black background;
1.2. The other is a fully black silhouette of the objects being rendered with transparency).
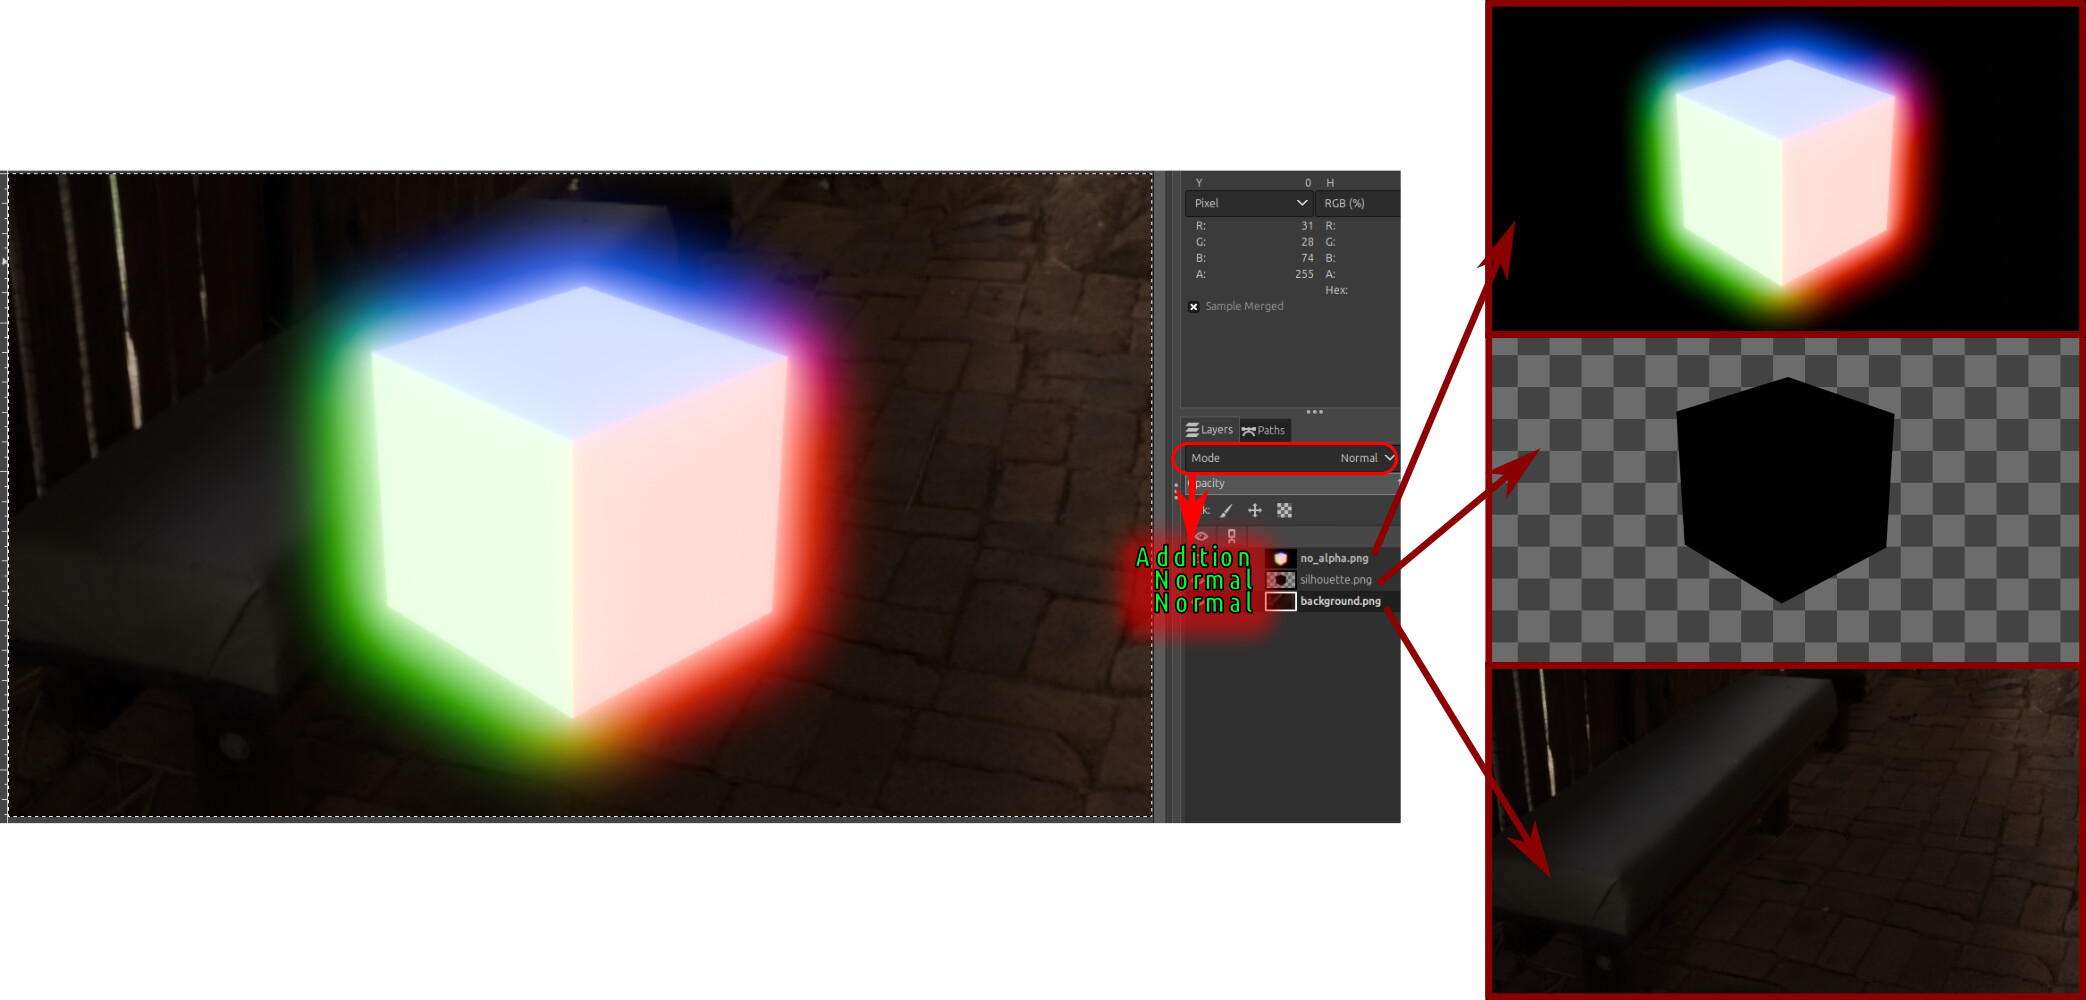
Add three layers to a GIMP document:
2.1. The lower one is the base image to which the effect should be added;
2.2. The middle one is the silhouette;
2.3. The upper one is the rendered image with the Glare effect. However, for this layer, change the Blend mode to Addition.
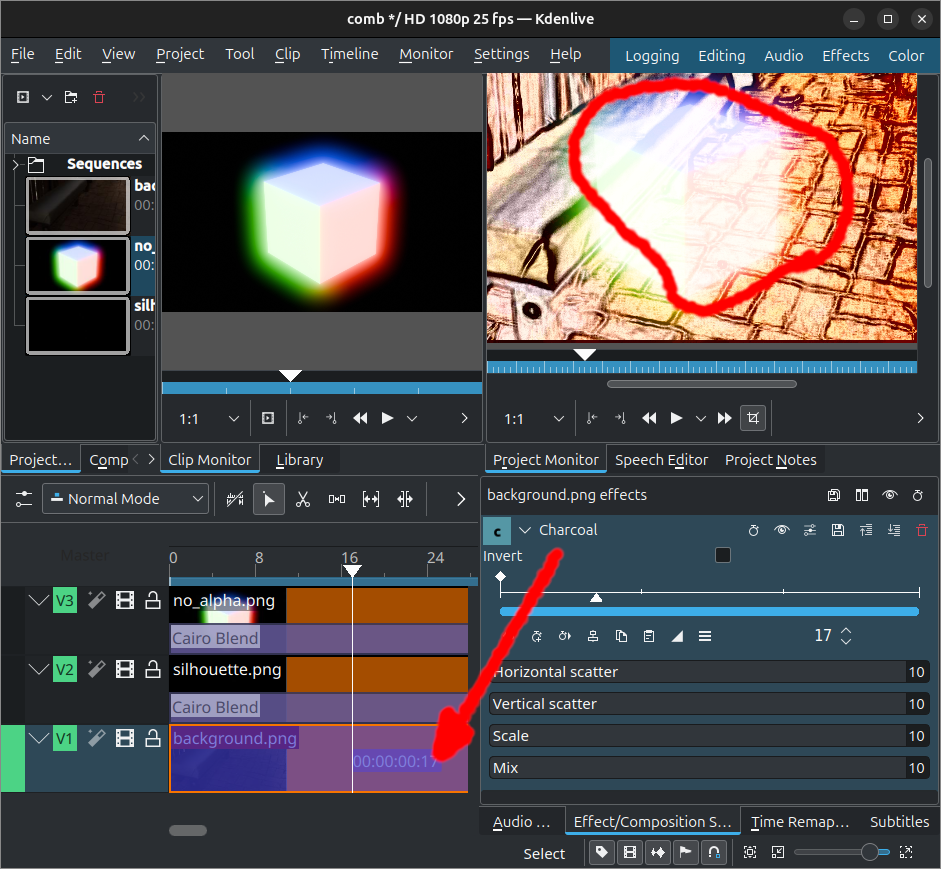
However, I need to composite a video, so, processing each frame in GIMP doesn’t sound nice. Thus, I tried achieve the same results in Kdenlive. I tried different composition effects with the Add Blend mode, but without luck (the base image is somehow hidden).
If the clip on V2 doesn’t have any transparency/alpha channel you need either a composition between V2 and V1 or use the Chroma Key effect on the clip on V2 to make black transparent.
Can you share the .kdenlive project file and the images so that I can play around with it?
You may also want to read this blog on how Kdenlive handles tracks.
Hello Berndmj,
Thank you for such a quick reply!
The V2 clip has transparency (it somehow not shown in Kdenlive, but you may see it in the middle layer in the GIMP screenshot in my original message).
Looks like I cannot add attachments on this forum. I’ve uploaded the files to a public file sharing service, but get an error when posting the link here. Maybe you can recommend how to share the file, please?
You are a new user and need to post more often to be granted the right to add attachments or post links. Until then you can just post the URL w/o making it a link.
The layer in GIMP works differently than a track in Kdenlive. If the image was not saved with the alpha channel kdenlive doesn’t know about it.
With your current setup of clips and tracks, add a composition between V2 and V1 and set it to Screen.
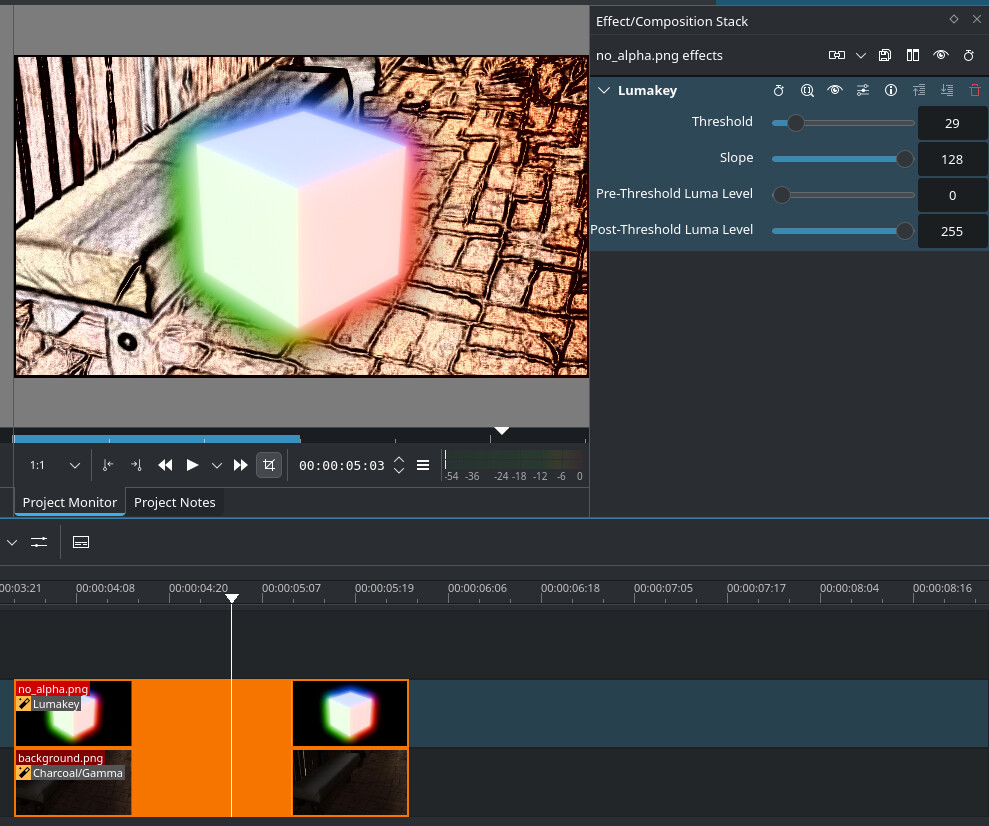
You could simplify your setup by just using no_alpha.png on V2 and adding a Screen composition. In case you want to use V3 for something else or don’t need it at all …
Played with it but without luck. I think, in such cases, it’d be easier to have another one image, the same as no_alpha.png, just with the transparent background (I use Blender for getting renders). This image can be put on top of existing renders.
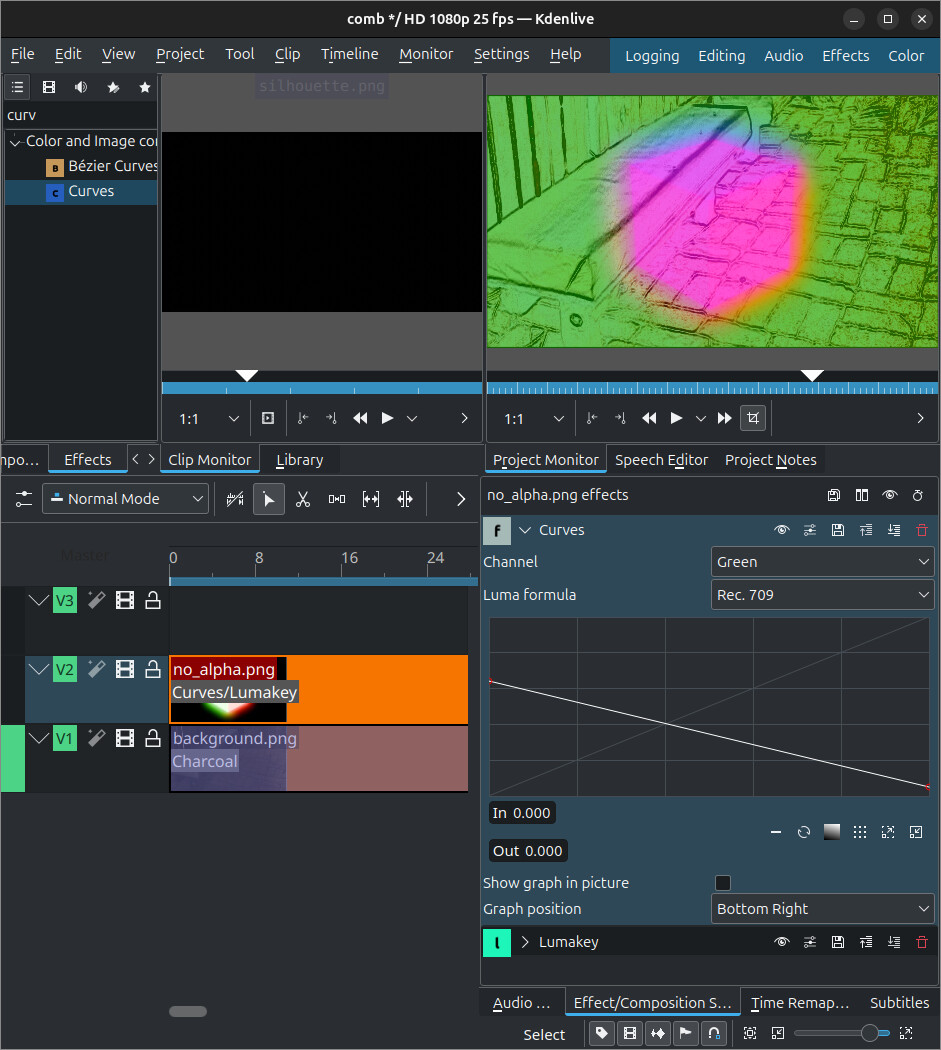
Oh! I see… You removed the silhouette.png and compositions. That’s greatly simplifies the entire setup. However, it looks like changing the object color has some influence of the Lumakey output.
Of course, because the sequence of effects in the stack matters. Reverse the sequence and you will see that Lumakey still works but the appearance of the final video changes