I am new to Kdenlive and video editing in general and I have a question regarding color correction and moire removal.
Is it possible to correct false colors and moire patterns?
This pattern arises because of the missing Optical Low-Pass Filter of my Panasonic S5.
Is there a method or AddOn with which I can correct it (at least the color would be nice)?
There are plenty of filters for color and image correction. I am not sure about the moire patterns, perhaps some noise or grain filters might help.
Please keep in mind that there is no magic effect or filter that does that by itself. You can apply multiple filters to the same clip, play with the individual settings and the combination of filters does what you want to achieve.
There are a few YT videos out there for color correction in Kdenlive …
Hello @foorin
I am very surprised by the shown color errors of the Panasonic S5. How strong is the cropping? More than 100%? Can hardly believe what can be seen here. Did you use a bad lens?
Your question about basic color correction is very valid. Maybe we should systematically point something like this out. But it would make sense to leave the moiree problems aside for now, after all it should be the basic color correction, for a start.
My suggestion: Upload an image example. Make a right click in the monitor of a completely unprocessed scene and choose: “Extract Frame to Project…”.
Then I can load this image into Kdenlive project and pass on the settings. Don’t choose a perfectly exposed scene, but don’t choose a totally messed up one either.
Thanks for your help.
Yes, I was also a bit surprised about the false colours. I use the Sigma 35 mm for L-Mount – so it is a sharp lens.
And yes, it is cropped more than 100 % - perhaps I am also a little too precise in this respect
I uploaded a few samples in full res as you said. In the Sample1 you can see it on the water, Sample2 the balcony, Sample3 also in the water and Sample4 you see the “colourful pixels” in the bushes (in the middle of the picture).
Hallo @foorin
Thanks for the picture examples. The image quality of your camera is not as bad as I feared. I suggest we forget about this topic.
Now we should approach the classic process of color correction.
First white balance. If you first optimize the contrast, the WB could then create clipping, because WB changes both the highlights and the shadows a little.
Then determine the black point and the white point and thus the contrast with levels. Then, best of all, do the white balance again.
Strictly speaking, you are then as good as done.
If you want to fine-tune the colors even more, there are wonderful tools: Lift/gamma/gain is excellent to influence the color tones in the shadows, the mids and the highlights separately. Unfortunately there is a bug. Not too bad, you can work around it: For Lift, don’t use moving the center of the color circle, that doesn’t work, but adjust the values with the mouse wheel when you click on the numerical value. With gamma and gain, however, it works perfectly as it should.
The popular tool “Bézier Curve” I can’t use at all at the moment, Kdenlive crashes guaranteed. But you can get along very well without it.
So, now I’ve thrown you a few chunks - try it out for yourself. But your examples are almost too good to make much and simple improvements. Please take worse pictures, with wrong WB and if possible with much less contrast. The famous log shots are intentionally much softer, flatter, so you don’t lose the highlights or the shadows. The final contrast is then created in editing.
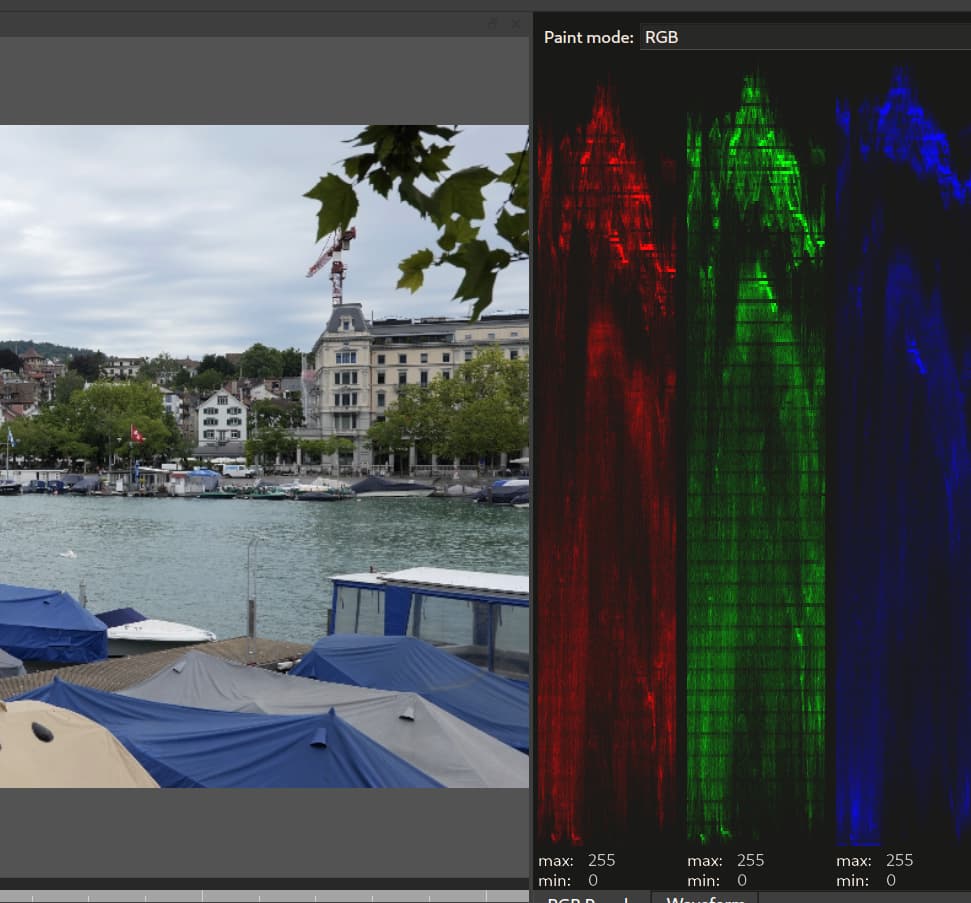
In your Sample1 you can see that the full brightness range of the important display instrument “RGB Parade” is already exhausted: For all three colors the values start at 0 (= absolute minimum) and end at 255 (= absolute maximum).
Lift/gamma/gain
With Input black level the dark tones are made even darker, the light ones are (almost not) affected. With Input white level only the bright values are made brighter. Both sliders increase the contrast.
Gamma adjusts the overall image brightness, (almost) without changing the Black and White Point.
Black output makes the darkest tones lighter. This makes the image appear brighter, of course, but also flatter, the contrast is reduced, there is no real black anymore.
With White output, the brightest areas are made darker, the contrast is also reduced, and there is then no real white left in the image.
It makes no sense to use both sliders for White, either Input only or output. With White, the settings cancel each other out completely if you enter the same numerical value both times.
With Black, strangely enough, this is not the case. From more than 150 or 200 you can’t compensate Input black level by the same value in Black output.
In any case, it makes no sense to use both at the same time.
Everything this tool does can be done much more precisely with the curves or the Bézier Curve. But Levels is easier to use.
Thanks a lot for your help, @micha
It really helped me.
In the meantime, I did a few first attempts and it is not that difficult.
I also had no problems with Kdenlive 23.04.1 – everything worked fine and it is a very cool software