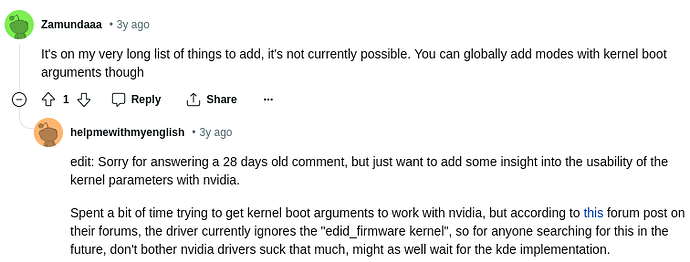
This approach was only tested on Arch Linux with both: KDE Plasma and Hyprland, both using Wayland session.
I do not know the outcome on the other distros. I’m also using systemd-boot, not grub, so, if you are using grub, you’re kinda on your own with specific steps for systemd-boot.
And, also, I sticked to the UKI (Unified Kernel Images), but that shouldn’t be a problem, just want to notify.
Quick Guide: Overclocking Monitor Refresh Rates on Arch Linux (KDE Wayland, NVIDIA, systemd-boot) using Custom EDID
This guide outlines how to set custom refresh rates for your monitors when the standard video= kernel parameter is rejected by the NVIDIA proprietary driver.
The solution involves using a custom EDID file.
Prerequisites:
- Arch Linux with KDE Plasma (Wayland session)
- NVIDIA proprietary drivers installed.
- systemd-boot as your bootloader (specifically using the
kernel-install framework where kernel parameters are managed via /etc/kernel/cmdline).
- Ability to create custom EDID files (e.g., using Custom Resolution Utility (CRU) on a Windows system)
- Knowledge of your target resolutions and refresh rates
- Knowledge of your display output names (e.g.,
DP-1, HDMI-A-1, DVI-D-1). You can find these by checking the output of cat /sys/class/drm/cardX-OUTPUT-Y/status for connected displays.
Steps
1. Prepare Your Custom EDID Files
Using a CRU on Windows, create the desired custom resolution and refresh rate for each monitor you want to overclock.
Export the EDID for each monitor as a separate .bin file (e.g., DP1_1920x1080_70Hz.bin, HDMI1_1920x1080_70Hz.bin, DVI1_1600x900_75Hz.bin).
2. Place EDID Files on Your Arch Linux System
Create the EDID directory if it doesn’t exist:
sudo mkdir -p /lib/firmware/edid/
Copy your exported .bin files into this directory:
sudo cp path/to/your/DP1_1920x1080_70Hz.bin /lib/firmware/edid/
sudo cp path/to/your/HDMI1_1920x1080_70Hz.bin /lib/firmware/edid/
sudo cp path/to/your/DVI1_1600x900_75Hz.bin /lib/firmware/edid/
3. Configure Kernel Parameters
Edit the kernel command line configuration file:
sudo nano /etc/kernel/cmdline
Remove any existing video= parameters related to your monitors if you tried that method before.
Add the drm.edid_firmware= parameter to specify your custom EDID files for each monitor. Separate multiple monitor entries with a comma. Ensure the output names (DP-1, etc.) match your system. Example:
root=PARTUUID=YOUR_ROOT_PARTUUID rw quiet drm.edid_firmware=DP-1:edid/DP1_1920x1080_70Hz.bin,HDMI-A-1:edid/HDMI1_1920x1080_70Hz.bin,DVI-D-1:edid/DVI1_1600x900_75Hz.bin
(Replace YOUR_ROOT_PARTUUID, quiet and other existing parameters as per your original setup. Ensure the filenames match what you copied.)
Save the file and exit the editor.
4. Update Bootloader Configuration & Initramfs
Run mkinitcpio to regenerate your initramfs. On Arch Linux, this process (when standard kernel-install hooks are in place) also updates your EFI boot entries with the new kernel command line from /etc/kernel/cmdline.
sudo mkinitcpio -P
Note: You do not need to add the EDID files to the FILES array in /etc/mkinitcpio.conf. The NVIDIA driver will load them from /usr/lib/firmware/edid/ when it initializes.
5. Reboot Your Computer
sudo reboot
or manually, doesn’t matter.
6. Verify the Changes
After rebooting, go to KDE Plasma’s System Settings > Display and Monitor. Your new, higher refresh rates should now be available for selection.
(Optional) Confirm the kernel command line:
cat /proc/cmdline
It should now include your drm.edid_firmware=... string.
(Optional) Check dmesg for messages from the NVIDIA driver related to EDID loading or mode setting:
sudo dmesg | grep -iE "nvidia.*edid|nvidia.*mode set"
Hopefully, this guide will be useful for others! Enjoy your smoother display!
![]()
