How to drag a video into V3 track?

Very new to video editing so this might be a bad idea. I am trying to use some masking to edit a video. To do that I put the main video in V1 track.

V2 is the same video shortened, masked and blurred to blur parts of the video.

Created V3 to repeat steps from 2 with another section and area of the video, but I can’t manage to drag a copy of the video into V3 track.

Dragging the video form Project Bin > Sequences does not insert the video into V3 track, as does copy pasting using cmd c + cmd v from within the tracks view.

I manually added another audio track as Project Bin - video won’t drag onto Track mentions this could be a requirement.

Oddly this moved the existing audio tracks to A2 and A3 and created A1 :thinking:

However I still can’t add the video to V3 track.

Certainly doing something very stupid. After increasing the blue bar at the top of the timeline I was able to drag the video into V3. Great.

However audio was added to A3 and it was added behind some existing audio which was moved to A3 after creating that track.

As I can’t move the existing audio I am now stuck it seems.

What’s missing for me to move audio from one track to another?

I also can’t remove the first audio part form A3. As soon as I remove that, the video part is also gone. I don’t need the audio as it is identical with A2 from the main clip.

Lol somehow the project didn’t save correctly and I lost the work which was already done. So I can start fresh I guess :woozy_face:

Well funnily after creating a new project and adding V1-4 and A1-4 adding the clip worked without issues.

Part of the confusion stems from the option to add a new track Above (default) V1 or A1 resulting in moved around existing tracks as the new audio track will then become A1.

I find this behavior unexpected and highly confusing.

I’m glad it worked in the end.

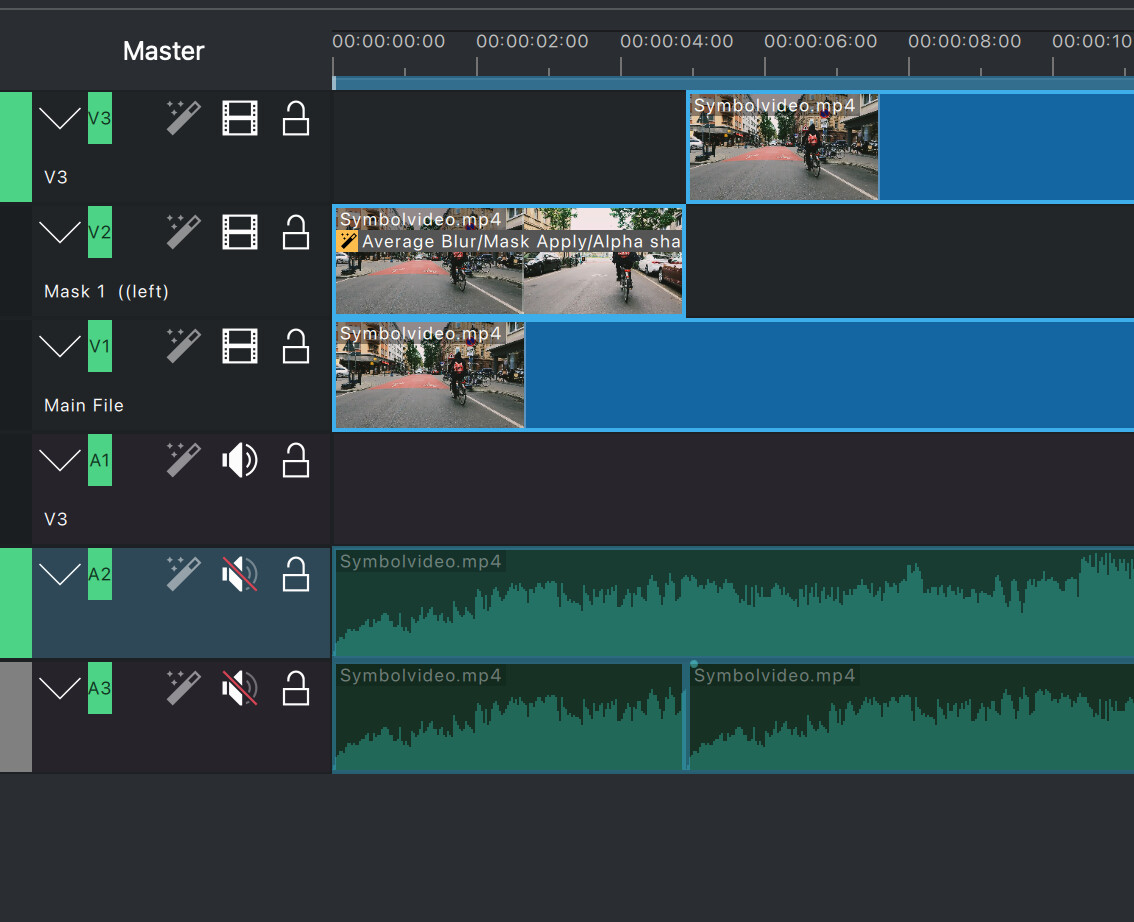
The way Kdenlive handles clips with a video and an audio stream is something to get used to. Kdenlive sees a clip with video and audio but it has to separate them into a video track and an audio track. By default, V1 corresponds to A1, V2 to A2, and so on. If you create additional video tracks and plan to put clips in there that have an audio stream, you need to create a corresponding audio track.

I’m not sure why this happened because when you move a clip from one video track to another, the audio stream is moved to the corresponding audio track (V1/A1 → V2/A3). If there is none, the clip cannot be moved.
This behavior is the case for clips with video and audio streams that have not been un-grouped. You can select a clip, right-click and select Ungroup. After that action, you can move the video portion of the clip independently from the audio portion - they essentially become two separate clips in the timeline. Note that you cannot undo this later. The only way to group them is to select both clips, right-click and select Group Selected Clips.

If you just need the video or audio stream of a clip in the bin, you can drag the clip to the timeline using the video or audio icon that shows up when hovering the mouse over the clip in the bin. The same feature is available from the Clip Monitor.

This happened because you must have enabled the Timezone Insert Mode.


It is this little icon that tells Kdenlive to insert a clip into the area identified by the blue bar above the timeline. You may want to read this section in the Kdenlive Manual.

That’s because the video and audio portion of the clip are still grouped as I have explained before. You need to ungroup them to be able to delete the audio stream of the clip.
In your scenario, it is better to just drag the video portion of the second clip to the timeline.

I know that Kdenlive can be intimidating at first, and its features and functions, menu structure, and the way it handles clips can be confusing. That’s particularly true for anyone venturing out into video editing. I suggest you browse the Kdenlive Manual and start with the Quick Start chapter.
If you are more of a visual learner, there are several good tutorials for beginners on YT (like this or this).

Have fun, and always come back here if you get stuck or need advice!

1 Like

Thanks so much for taking the time to elaborate and explain.

I learned about using keyframes and how to have effects show at a certain point in the video and then disable again. Basically I set the first key frame to not use the effect by setting the effect to 0. Then use another key frage to set the effect to the desired value and have it show. Reverse process to take the effect out when needed.

Is that the “correct” way to do this? I first tried to move the start key frame (first frame of video), but found that is not possible. So came up with the idea to set effect to 0 and only have it apply desired value at the desired point in timeline via next keyframe.

I think this is a new topic and needs a separate thread …